I bought a bunch of woodworking safety gear on Amazon a few weeks ago. I’ve been working with it and my only problem is everything gets too dusty in the shop.
I decided to build a safety gear cabinet with a plexiglass door so it stays dust free and always on my mind. I also do a review of a few items including: 3M safety glasses, Uvex s1600x bandit glasses, 3M Peltor H10A and the 3M TEKK worktunes hearing protection.
We spent 4th of July on the beach so there wasn’t enough time to complete a project in the shop. We thought instead of no video, we’d share our afternoon together working on the Mercedes A/C system.
I bought the kit to convert the ACCII climate control to electronic on eBay for $250 bucks. Unfortunately, it was missing a part, so we couldn’t getting working for you in this video. We’ll post a short update whenever it’s fully functional.
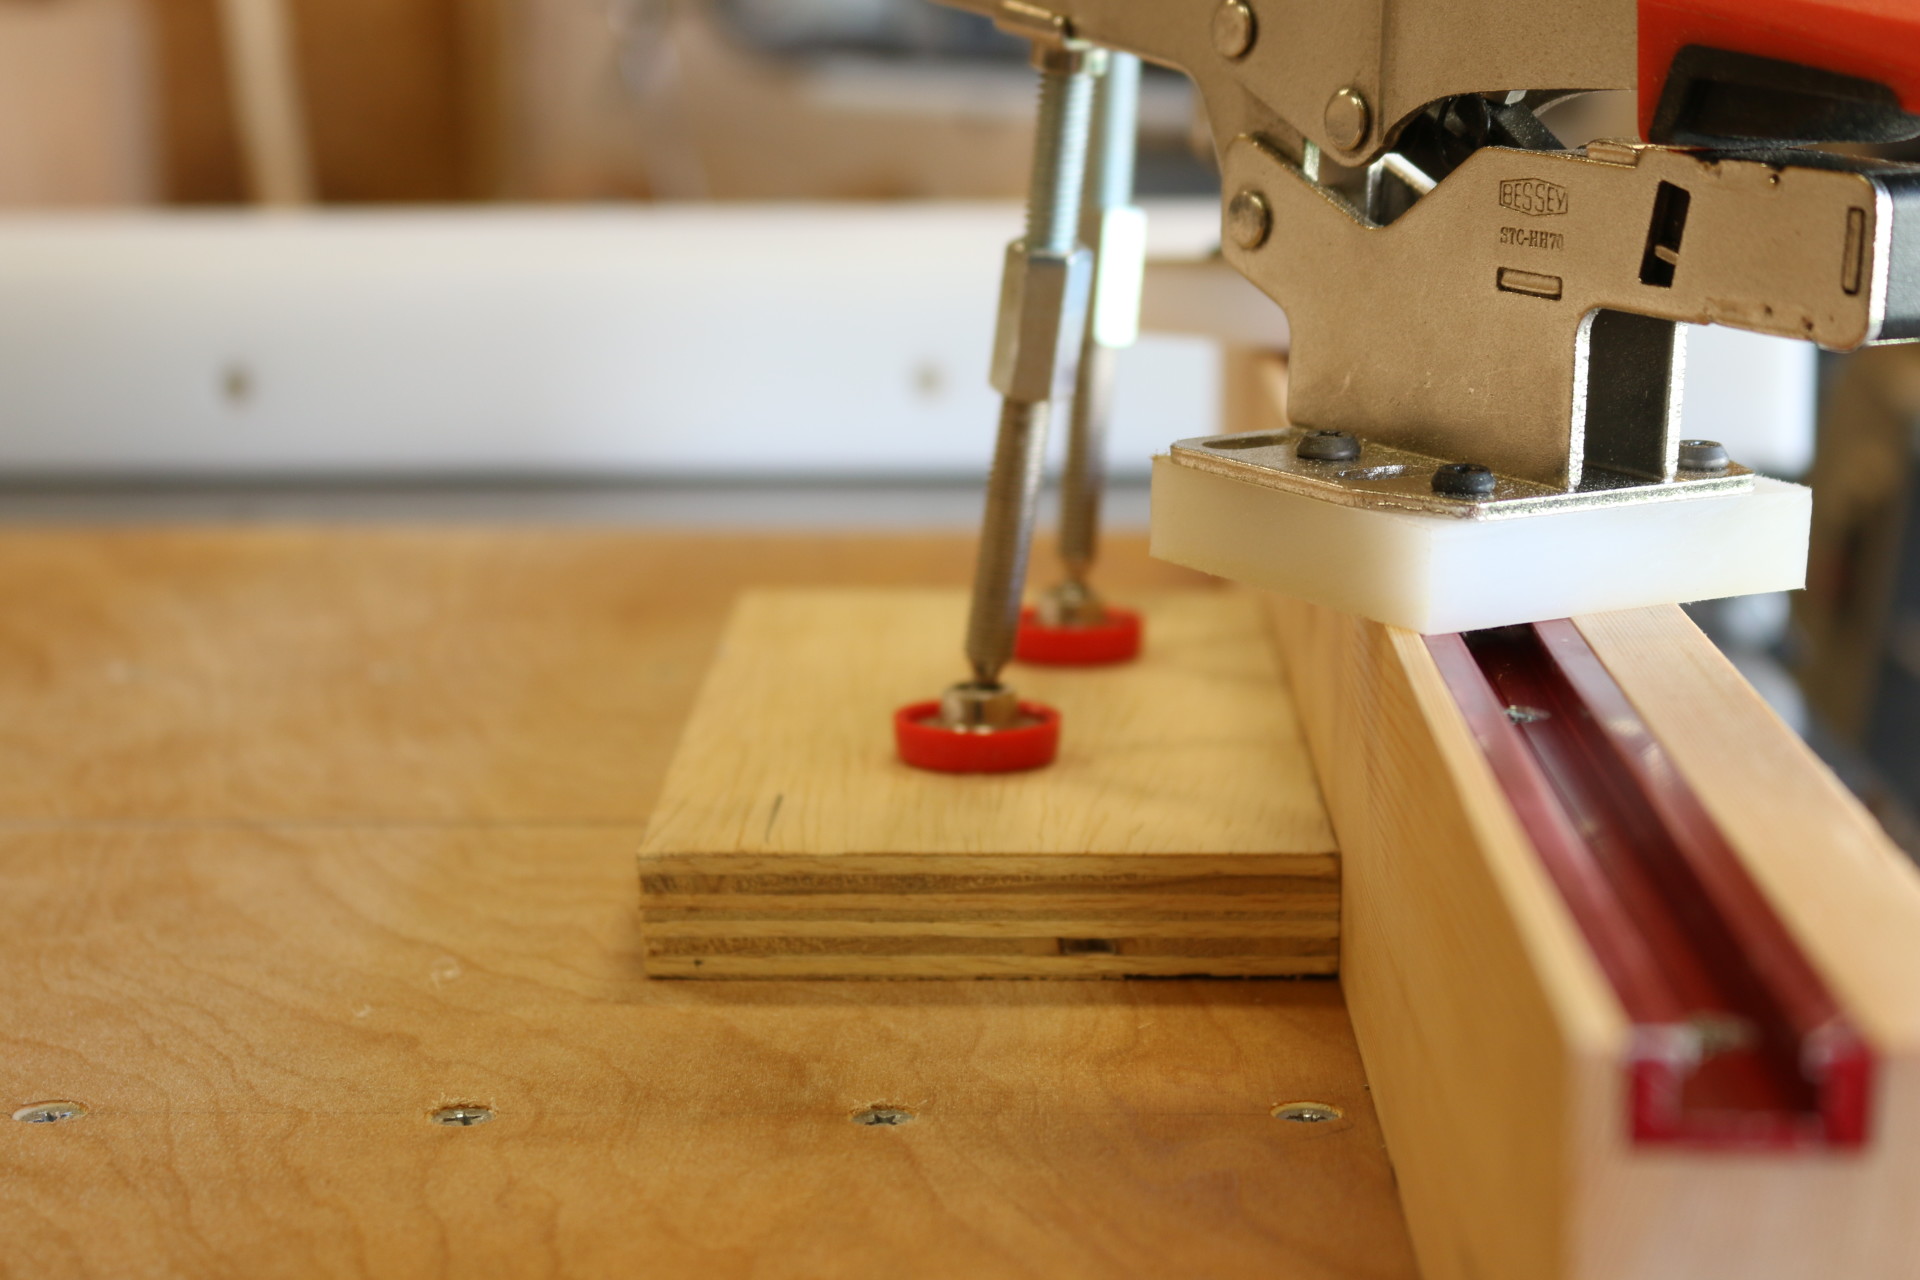
How to make a small table saw sled with built in t-track, toggle clamps, and stop block. A simple crosscut sled can be used to make accurate 90 degree cuts on the table saw and allow you cut small pieces safely.
I made the runners from UHMW plastic (low friction) since they are less likely to warp or twist. The track is 1/4″ mini t-track from shop fox, and the flip stop is from peachtree woodworking. My favorite features are the Bessey auto-adjust horizontal toggle clamps. They were a bit pricey, but they are well built and easy to use. I modified them to slide onto the track with more UHMW plastic and brass threaded inserts for 1/4″ bolts.
My finished sled was precise to .02″ inches over 4ft (using the 5 cut table saw sled test for accuracy). If I want, I can easily shim the back fence and probably cut that in half. The size ended up being 24″ wide and 15″ tall/deep.
A friend of ours saw a picture of a chilled whiskey dispenser online. They thought it would be perfect addition to their office to entertain high end clients.
I decided I would attempt to make one with an old dehumidifier. This is my first attempt.
Lauren wanted to make wooden letters that spelled “love” for the living room. I thought it would be a good chance to try a micarta style layering of fabric and wood.
All was going well until the epoxy set up too fast half-way through. We changed gears and didn’t use the maple veneer I made, but ended up with a unique decoration and a memorable time together in the shop.
How to build a lithium ion electric bike battery pack from recovered used laptop batteries. Save hundreds of dollars by salvaging 18650 li-ion cells from used or even dead laptop batteries bought off eBay.
My pack is 24 volt 20AH which should hopefully provide a 30-45 mile range per charge on my ebike (and cost less than $150 dollars). In the video I show you how to calculate the capacity, then wire and test the completed battery.
I built shelves to organize my power tools last week, but I needed a way to organize my extension cords. I was inspired by a Pinterest pin and the 5 in 1 coat hangers that you’ve “seen on TV.”
In this video I design my own space saving extension cord organizer that folds down flat against the wall when not in use. Overall I was very happy with the design and it’s working great!
I don’t have plans for this build, but if there’s enough interest I might put together a sketch or two.
This week I build power tool organization above my new tool board that we made last week. Each shelf was custom built to hold each power tool with a shelf below that organizes all of the cables.
I was pleasantly surprised with the results. It’s nice to finally have a place to store everything!
I’ve had my hand tools in a drawer at home for weeks after building the workshop. It was time to organize all of my hand tools on the wall with a custom tool board.
In this video I make holders for my most used tools (pliers, wrenches, hammer, tape measure, knife, screwdrivers, speed square etc.) Like Matthias and others, I prefer this tool board over the french cleat system.
We have strange shelves in the walls of our living room that end up collecting junk. We wanted to experiment making a 3D wood photo cutout using Steve Ramsey’s inkjet photo transfer method.
The project turned out great! How we divided the photo into layers worked out perfect, and the scroll saw made quick work of the cuts.
When we do it again, we’ll make sure to have plenty of ink the printer, do a lot more sanding, and use an image with more contrast.